Flashing
Now that we have installed Libreboot, set up flashprog, and prepared our Raspberry Pi Pico as an SPI programmer, we are finally ready to flash the BIOS. Before we dive into the steps, I want to emphasize the importance of making a backup copy of your current BIOS. This way, if anything goes wrong during the flashing process, you will have a copy of the original BIOS that you can restore.
Locate the chip(s)
The following ThinkPad models have a 12MB BIOS, which is split between two chips on the motherboard: one with 4MB and the other with 8MB.
- X230 – Accessing the BIOS chips is simple; you only need to remove the keyboard and palm rest (see the photo).
- T440p – The BIOS chips can be accessed from the back of the laptop.
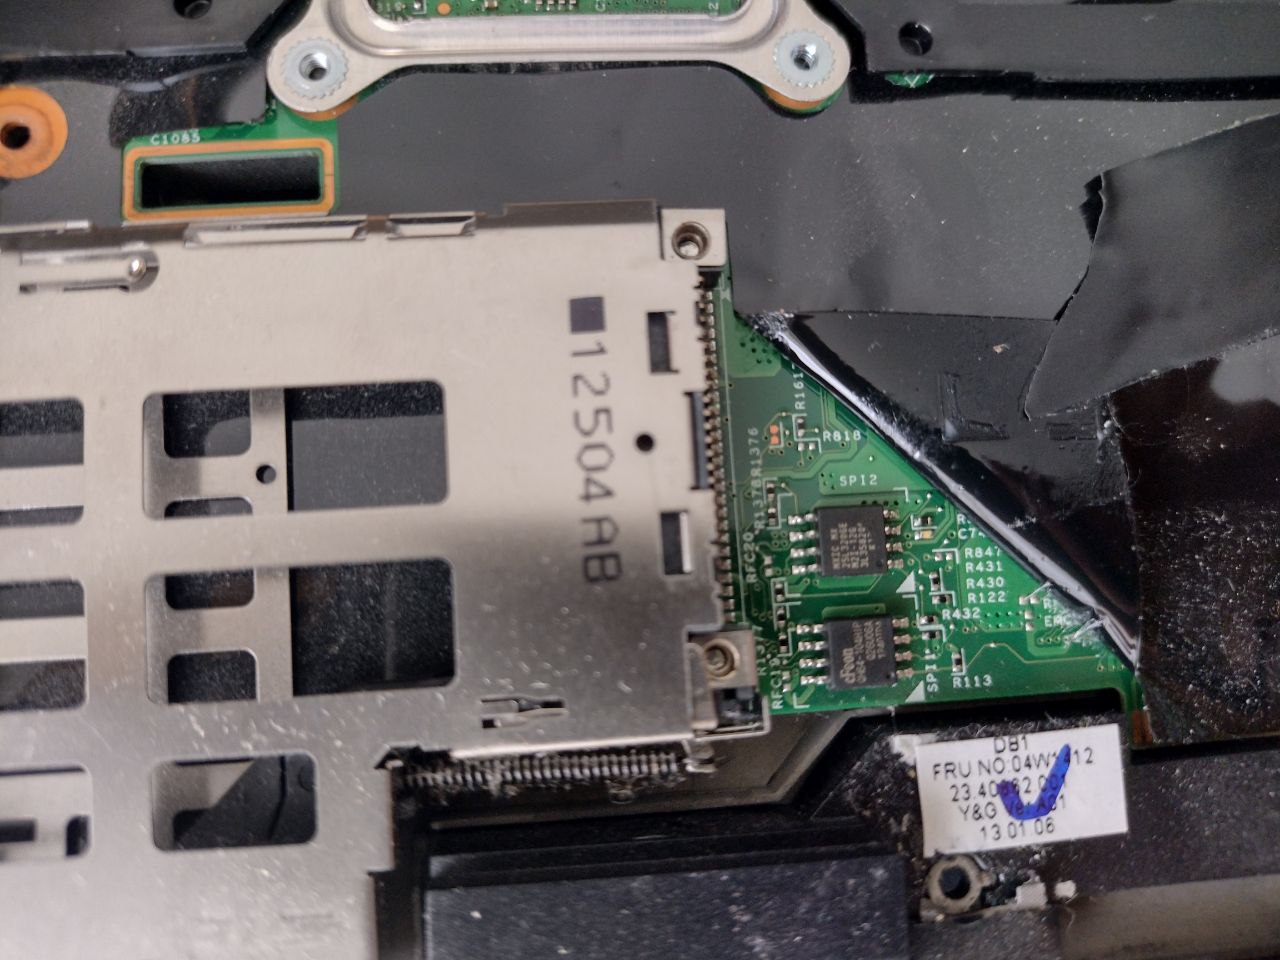
- T420 / T430 / T530 / W530 – Full disassembly of the laptop is required to access the BIOS chips.
If you're flashing this model, you DO NOT need to split the ROM, as it has only one chip. It's easily accessible by simply removing the back cover of the laptop. You’ll only need to flash that single chip.
Splitting the Rom
For the , you'll need to divide your ROM into two distinct portions prior to flashing. This can be accomplished using the dd command.
dd if=seabios_<rom_name>_libgfxinit_corebootfb.rom of=libreboot_top.rom bs=1M skip=8
dd if=seabios_<rom_name>_libgfxinit_corebootfb.rom of=libreboot_bottom.rom bs=1M count=8
Detect the Chip(s)
Now, you need to detect the chip models using flashprog. To ensure accurate detection, follow these steps for each BIOS chip:
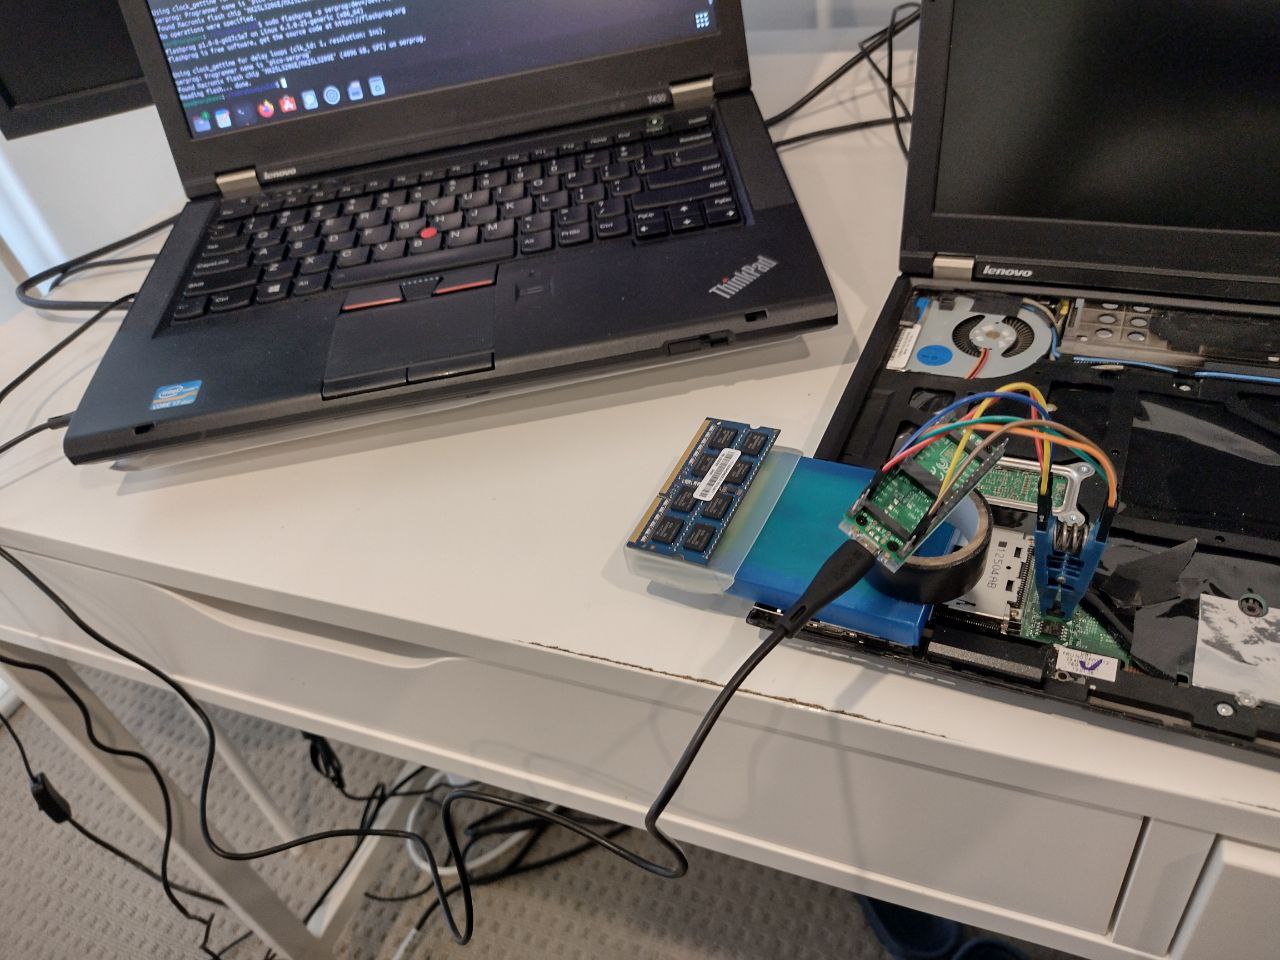
- Connect the Raspberry Pico to the Pomona using Dupont cables, as completed in the preceding step.
- Clip the Pomona onto the top BIOS chip firmly
- Plug the Raspberry Pico into the laptop using a USB cable
Execute the following command to detect the chip
sudo flashprog -p serprog:dev=/dev/ttyACM0,spispeed=16M
If multiple chips are detected, verify whether the one you previously photographed or one closely resembling it is present. Subsequently, re-run the command, making sure to specify the name of the pertinent chip.
sudo flashprog -p serprog:dev=/dev/ttyACM0,spispeed=16M -c "MX25L3206E/MX25L3208E"
If the Raspberry Pico detects the chip, you may proceed by creating a backup.
Backup the factory Bios
To create a reliable backup of the BIOS chip(s), it's advisable to perform a triple dump of them
factory_top.bin
sudo flashprog -p serprog:dev=/dev/ttyACM0,spispeed=16M -c "MX25L3206E/MX25L3208E" -r factory_top.bin
sudo flashprog -p serprog:dev=/dev/ttyACM0,spispeed=16M -c "MX25L3206E/MX25L3208E" -r factory_top2.bin
sudo flashprog -p serprog:dev=/dev/ttyACM0,spispeed=16M -c "MX25L3206E/MX25L3208E" -r factory_top3.bin
Next, use sha1sum to compare the dumped BIOS images
sha1sum factory_top.bin factory_top2.bin factory_top3.bin
If the hashes match, you should see something like this:
6cf9bfc90df1ed01336872cd159a00c101d0a7b0  factory_top.bin
6cf9bfc90df1ed01336872cd159a00c101d0a7b0  factory_top2.bin
6cf9bfc90df1ed01336872cd159a00c101d0a7b0  factory_top3.bin
Once you've confirmed that the hashes are the same, you can clean up any temporary dump files:
rm -fr factory_top2.bin factory_top3.bin
factory_bottom.bin
sudo flashprog -p serprog:dev=/dev/ttyACM0,spispeed=16M -c "EN25Q64" -r factory_bottom.bin
sudo flashprog -p serprog:dev=/dev/ttyACM0,spispeed=16M -c "EN25Q64" -r factory_bottom2.bin
sudo flashprog -p serprog:dev=/dev/ttyACM0,spispeed=16M -c "EN25Q64" -r factory_bottom3.bin
Next, use sha1sum to compare the dumped BIOS images
sha1sum factory_bottom.bin factory_bottom2.bin factory_bottom3.bin
If the hashes match, you should see something like this:
06347c0988657c5df41fa3a691071d0105b0edba  factory_bottom.bin
06347c0988657c5df41fa3a691071d0105b0edba  factory_bottom2.bin
06347c0988657c5df41fa3a691071d0105b0edba  factory_bottom3.bin
Once you've confirmed that the hashes are the same, you can clean up any temporary dump files:
rm -fr factory_bottom2.bin factory_bottom3.bin
Write the Rom to the Chip
Before writing the BIOS into the chip(s), ensure to remove the CMOS battery as a security precaution.
libreboot_top.rom
sudo flashprog -p serprog:dev=/dev/ttyACM0,spispeed=16M -c "MX25L3206E/MX25L3208E" -w libreboot_top.rom
To double-check, you can dump the newly flashed BIOS image
sudo flashprog -p serprog:dev=/dev/ttyACM0,spispeed=16M -c "MX25L3206E/MX25L3208E" -r flashed_top.bin
Next, use sha1sum to compare the dumped BIOS image with the original libreboot_top.rom file
sha1sum libreboot_top.rom flashed_top.bin
If the hashes match, you should see something like this:
42489cdfda9666177cd9abc1876f4dea258f7ab8  libreboot_top.rom
42489cdfda9666177cd9abc1876f4dea258f7ab8  flashed_top.bin
Once you've confirmed that the hashes are the same, you can clean up any temporary dump files:
rm -fr flashed_top.bin
libreboot_bottom.rom
sudo flashprog -p serprog:dev=/dev/ttyACM0,spispeed=16M -c "EN25Q64" -w libreboot_bottom.rom
To double-check, you can dump the newly flashed BIOS image
sudo flashprog -p serprog:dev=/dev/ttyACM0,spispeed=16M -c "EN25Q64" -r flashed_bottom.bin
Next, use sha1sum to compare the dumped BIOS image with the original libreboot_bottom.rom file
sha1sum libreboot_bottom.rom flashed_bottom.bin
If the hashes match, you should see something like this:
4b9f06ccd2ce11dad757e337829a450a05df7929  libreboot_bottom.rom
4b9f06ccd2ce11dad757e337829a450a05df7929  flashed_bottom.bin
Once you've confirmed that the hashes are the same, you can clean up any temporary dump files:
rm -fr flashed_bottom.bin
If everything went well, simply restart your laptop before putting it back together to ensure that Libreboot starts properly.